

Make these fun ornament balls yourself. These cute ornament balls are the perfect holiday and Christmas addition to any space! Impress your family and friends with your crochet skills.
See more home decor PDF patterns
I love getting ready for the holidays and busting the decor out. I was thinking of a fun and easy homemade crochet design and I just loved the idea of simple, classic, ornament balls. These are super simple to make and are a toned down take on classic Christmas colors.
This free version includes the 3 ornament balls, but you can also get the PDF printable version of this ornament set that also includes a dough bowl pattern so you can have a place for your three ornaments! Then you can easily display the set on your tv mantle, coffee table, or fireplace mantle.
Dough Bowl and Ornaments PDF Pattern

I got this idea to place them in a dough bowl due to the popularity of my:
Dough Bowl and Pumpkins Pattern
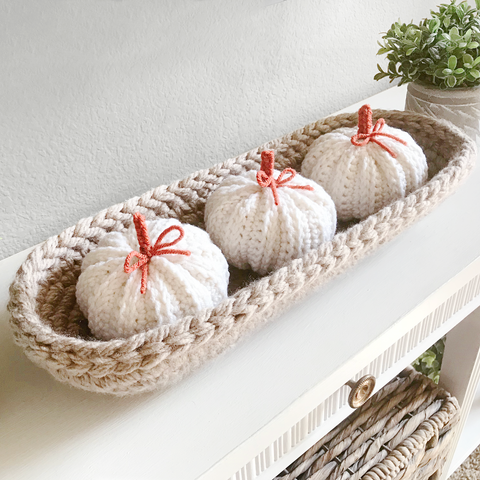
that you all seemed to love! The Dough Bowl and Ornaments Pattern uses the same dough bowl pattern, so if you already purchased that pattern, then you can just swap out the pumpkins for these ornaments! Voila!
Free Ornament Pattern Set
What you'll need:
• 10 mm crochet hook
• 5 mm crochet hook
• 220 yards of light brown yarn (size 5) (Loops & Threads Charisma in Taupe)
• 200 yards of off-white yarn (size 4) (Caron One Pound in Off White)
• 50 yards of green yarn (size 4) (Craftsmart Value in Leaf Green)
• 50 yards of burgandy yarn (size 4) (Red Heart Super Saver in Claret)
• Poly-Fil Stuffing
• A stitch marker for working in the round
• Yarn Needle
2”x2” Gauge: Dough Bowl: 3 stitches x 4 rows Ornaments: 8 stitches x 8 rows
Dimensions: Dough Bowl - 16.5” x 6.5” x 3” / Ornaments - 5” x 5”
Skill Level: Easy - Basic crochet skills and techniques needed.
*Written in US crochet terms*
Pattern Key:
sc = single crochet
st = stitch
sl st = slip stitch
rnd = round
ch = chain
invdec = invisible decrease
inc = increase

1) THREE STRIPES ORNAMENT
• start with off-white and use 5 mm hook
rnd 1: sc 6 into magic circle (6)
rnd 2: inc 6 (12)
rnd 3: [sc 1, inc] 6 times (18)

rnd 4: sc 1, inc, [sc 2, inc] 5 times, sc 1 (24)
• make sure that the “right side” of your work is facing outward
rnd 5: [sc 3, inc] 6 times (30)
rnd 6: sc 2, inc, [sc 4, inc] 5 times, sc 2 (36)
rnd 7: [sc 5, inc] 6 times (42)
• change to burgandy
rnd 8: sl st 1, sc 41 (42)
• change to off-white
rnd 9: sl st 1, sc 41 (42)
rnd 10: sc 42 (42)
rnd 11: sc 1, change to green, sl st 1, sc 40 (42)
rnd 12: sc 42 (42)
rnd 13: sc 2, change to off-white, sl st 1, sc 39 (42)
rnd 14: sc 42 (42)
rnd 15: sc 3, change to burgandy, sl st 1, sc 38 (42)
rnd 16: sc 4, change to off-white, sl st 1, invdec,
[sc 5, invdec] 5 times (36)
rnd 17: sc 2, invdec, [sc 4, invdec] 5 times, sc 2 (30)
rnd 18: [sc 3, invdec] 6 times (24)
rnd 19: sc 1, invdec, [sc 2, invdec] 5 times, sc 1 (18)
rnd 20: [sc 1, invdec] 6 times (12)
• stuff ornament
rnd 21: invdec 6 (6)

FINISHING THE ORNAMENT
• fasten off, leaving a long end. Attach end to a yarn needle and thread through each st and pull tight to close hole
• push needle into the ornament through the stuffing and out the other side and clip yarn, to hide end
To make top loop & bow:
• use off-white yarn. Leaving a long end, ch 13, fasten off, leaving another long end and attach end to a yarn needle. Create a loop by threading the two ends together, then thread through the top of the ornament and attach. Tie a square knot with both ends, and then tie a bow with the two ends and trim the ends to desired length.

2) RED CENTER STRIPE ORNAMENT
• start with off-white and use 5 mm hook
rnd 1: sc 6 into magic circle (6)
rnd 2: inc 6 (12)
rnd 3: [sc 1, inc] 6 times (18)
rnd 4: sc 1, inc, [sc 2, inc] 5 times, sc 1 (24)
• make sure that the “right side” of your work is facing outward
rnd 5: [sc 3, inc] 6 times (30)
rnd 6: sc 2, inc, [sc 4, inc] 5 times, sc 2 (36)
rnd 7: [sc 5, inc] 6 times (42)
rnd 8-9: sc 42 (42)
• change to burgandy
rnd 10: sl st 1, sc 41 (42)
rnd 11-13: sc 42 (42)
rnd 14: sc 2, change to off-white, sl st 1, sc 39 (42)
rnd 15: sc 42 (42)
rnd 16: [sc 5, invdec] 6 times (36)
rnd 17: sc 2, invdec, [sc 4, invdec] 5 times, sc 2 (30)
rnd 18: [sc 3, invdec] 6 times (24)
rnd 19: sc 1, invdec, [sc 2, invdec] 5 times, sc 1 (18)
rnd 20: [sc 1, invdec] 6 times (12)
• stuff ornament
rnd 21: invdec 6 (6)
FINISHING THE ORNAMENT
• fasten off, leaving a long end. Attach end to a yarn needle and thread through each st and pull tight to close hole
• push needle into the ornament through the stuffing and out the other side and clip yarn, to hide end
To make top loop & bow:
• use off-white yarn. Leaving a long end, ch 13, fasten off, leaving another long end and attach end to a yarn needle. Create a loop by threading the two ends together, then thread through the top of the ornament and attach. Tie a square knot with both ends, and then tie a bow with the two ends and trim the ends to desired length.
3) GREEN SPOTTED ORNAMENT
• start with green yarn and use 5 mm hook
• working a in a continuous round
rnd 1: sc 6 into magic circle (6)
rnd 2: inc 6 (12)
rnd 3: [sc 1, inc] 6 times (18)
rnd 4: sc 1, inc, [sc 2, inc] 5 times, sc 1 (24)
• make sure that the “right side” of your work is facing outward
rnd 5: [sc 3, inc] 6 times (30)
rnd 6: sc 2, inc, [sc 4, inc] 5 times, sc 2 (36)
• change to off-white
rnd 7: sl st 1, sc 4, inc, [sc 5, inc] 5 times (42)
rnd 8: [sc 5, change to green, puff st, change to off-white] 7 times (42)
Note: Carry the green yarn under the off-white work in between puff stitches
(see puff stitch instructions below)
rnd 9: sc 42 (42)
rnd 10: sc 3, change to green, puff st, change to off-white, [sc 5, change to green, puff st, change to off-white] 6 times, sc 2 (42)
rnds 11-12: sc 42 (42)
rnd 13: sc 1, change to green, puff st, change to off-white, [sc 5, change to green, puff st, change to off-white] 6 times, sc 4 (42)
rnd 14: sc 42 (42)
rnd 15: [sc 5, change to green, puff st, change to off-white] 7 times (42)
rnd 16: [sc 5, invdec] 6 times (36)
rnd 17: sc 2, invdec, [sc 4, invdec] 5 times, sc 2 (30)
rnd 18: [sc 3, invdec] 6 times (24)
rnd 19: sc 1, invdec, [sc 2, invdec] 5 times, sc 1 (18)
rnd 20: [sc 1, invdec] 6 times (12)
• stuff ornament
rnd 21: invdec 6 (6)
--------------------------------------------------------------------
Puff Stitch:
1: YO and insert the hook into the st
2: YO and pull up a loop
3: Repeat 1-2 until you have 9 loops left on the hook
4: To change color- Drop green yarn and pick up off-white.
5: YO and pull through all 9 loops
Note: Normally for a puff st you would end with a ch 1, but for this pattern, go straight into working the next sc after completing step 5
--------------------------------------------------------------------
FINISHING THE ORNAMENT
• fasten off, leaving a long end. Attach end to a yarn needle and thread through each st and pull tight to close hole
• push needle into the ornament through the stuffing and out the other side and clip yarn, to hide end
To make top loop & bow:
• use off-white yarn. Leaving a long end, ch 13, fasten off, leaving another long end and attach end to a yarn needle. Create a loop by threading the two ends together, then thread through the top of the ornament and attach. Tie a square knot with both ends, and then tie a bow with the two ends and trim the ends to desired length.
Aaaaaand you're done! 👏 👏 👏 Enjoy your ornaments!
Remember, if you'd like the dough bowl instructions and the whole pattern in printable PDF version, you can get it here:
Dough Bowl and Ornaments PDF Pattern
You can shop all of our patterns here: Little Light Design Pattern Store
Be notified of more free patterns by subscribing to our mailing list below!
- Jeanette
-------------------------------------------------------------------------------------
Check out ALL the fun Christmas Patterns we have:
HOLIDAY PATTERN COLLECTION
If you loved this dough bowl and ornaments pattern, here are other Christmas patterns that you might love making!
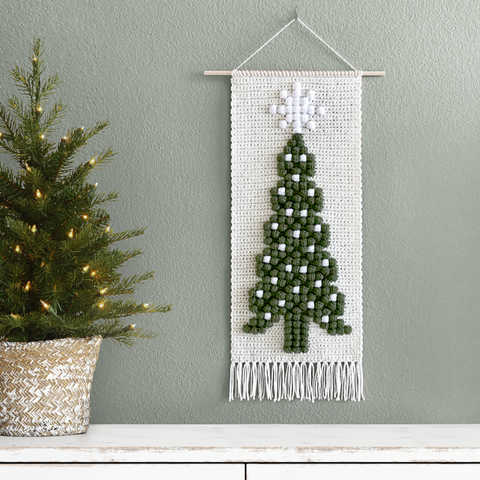
Christmas Tree Wall Hanging | Crochet Pattern
Joy Wall Hanging | Crochet Pattern

Let it Snow Wall Hanging | Crochet Pattern
